
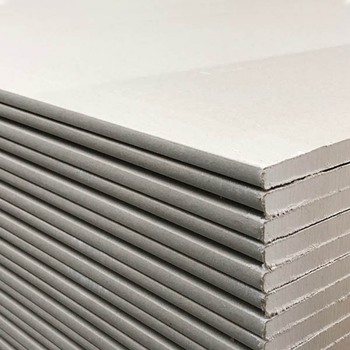
Plasterboard, also known as drywall or gypsum board, is a very popular material for ceilings and interior walls in modern construction.
It is a very versatile material that consists of a gypsum plaster core that sits between two layers of heavy paper, making it lightweight yet durable enough for the majority of residential and commercial jobs.
Ready to fit plasterboard for the first time? Read on, as we break down how to complete this task successfully.
Where is Plasterboard Used?
Plasterboard is commonly used throughout homes and buildings, in partition walls, ceiling linings, and for boxing in pipework. It is also very useful for creating feature walls and is a highly popular choice for new builds and renovations. Why? It’s cost-effective, fire-resistant, and relatively straightforward to install once you grasp the basics.
Understanding Different Types of Plasterboard
It’s important to remember that different types of plasterboard are created in different ways. For instance, standard plasterboard works fine for most dry areas, but moisture-resistant boards are a must-have in bathrooms and kitchens.
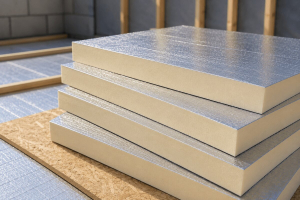
In areas that need better fire-ratings, fire-resistant plasterboard comes into its own, while insulation plasterboards combine thermal efficiency with wall construction. Acoustic plasterboard helps reduce sound transmission between rooms, which is absolutely ideal for bedrooms or home offices.
Essential Tools and Materials For Fitting Plasterboard
Before getting started, gather everything you’ll need. Your shopping list should include the plasterboard sheets themselves, metal stud and channel for the framework, drywall screws, and joint tape. Angle beads protect external corners, and joint compound will help finish the seams.
Tool-wise, pick up a utility knife or plasterboard saw, along with a T-square or straight edge, a drill/driver, a plasterboard fitter, and taping knives for finishing work.
Step-by-Step Installation Process for Fitting Plasterboard
1. Prepare Your Framework
Start by installing your metal stud framework at 400mm or 600mm centres, depending on your board thickness. Ensure everything is plumb and level – this foundation determines how professional your finished wall looks.
2. Measure and Cut
Measure each board carefully, remembering to account for any electrical outlets or switches. Score the paper face with your utility knife using a straight edge, snap the board backwards, then cut through the paper on the reverse. Always cut with the finished face upwards to ensure clean edges.
3. Fix the Boards
Position your first board vertically against the studs, ideally starting from a corner. Drive drywall screws every 200-300mm along each stud, keeping them at least 13mm from board edges. The screw heads should sit just below the surface without breaking the paper – countersink them slightly for easier finishing later.
4. Handling Joints
Stagger your joints in a brick-bond pattern rather than having continuous seams running up the wall. This creates a stronger, more stable surface that's less prone to cracking.
Repairing and Maintaining Plasterboard
Small holes from picture hooks can be filled with standard filler. For larger damage, cut out the affected area as a neat square, add backing supports, then screw in a patch piece and finish as you would any joint. Corner beads protect vulnerable edges from knocks and damage, keeping any potential repair work to a minimum.
With patience and the right materials and tools, fitting plasterboard is an achievable DIY project that can transform your space affordably and effectively.
Contact Us For Advice
We hope this guide has given you a clearer understanding of how to fit plasterboard. If you get stuck at all or have any specific questions, don’t hesitate to get in touch. We have expertise in this area and will be happy to share our knowledge to help you complete the job smoothly and efficiently.
